 Skip to content
YOUR STEP-BY-STEP GUIDE TO
ARMOR SHIELD IX APPLICATION
STEP 1: PREP
Alright, it's showtime!
Prep for success, that's what we always say.
Before we start applying the world's #1 DIY ceramic coating we need
to make sure your canvas (your car's surface) is worthy of such a
masterpiece. You want the best-looking car in the neighbourhood for
the next two years? Then it's important to put the effort in with
the prep now.
It's critical that no waxes, sealants, oils, or other cleaning
products are on the surface. If you have used wax or something
similar previously, you'll want to make sure it's stripped.
It's not mandatory but ideally, you also want the surface
scratch-free and polished to perfection (the ceramic will 'lock' in
the condition)
PREPPING YOUR CAR
1. Wash & Decontaminate
Thoroughly wash the car. Use a hose with light pressure to prewash & then hand wash with car
shampoo using
the 2-bucket method. Allow the surface to dry. Our specially formulated Prep Shampoo is awesome
at breaking
down that dirt and grime and helping decontaminate the surfaces.
Use Iron & Tar Removal products if required. Drop our Expert Team a line to get their
recommended products
and tips.
2. Claybar or Clay Mitt
(we personally prefer the ease and speed of a Mitt, this is a good one)
Spray a liberal amount of lubricant onto the surface, and gently move the Clay Mitt back and
forth across
the paint in a
criss-crossing motion, to create a glass like finish.
3. To Polish or not?
We recommend a machine polishing at this step to remove any light scratches or imperfections in
your car’s clearcoat.
A light ‘exfoliation’ with a finishing polish will really make that surface shine and pop before
we lock it in in all
it’s glory using the ceramic coating. Be mindful of trim, you don’t want to scar textured trim
or have it clogged up
with polish, tape it off if necessary.
4. IPA Wipedown
Wipe the surface down fully using an IPA (isopropyl alcohol) / rubbing alcohol product. Check
out our
specially
formulated IPA Spray here.
*Please note that if your car's surface is faded, in poor condition, or scratched, we recommend
paint
correction and
polishing after Step 2.
Once completed, we do highly recommend that you carry out a quick test before you ceramic coat
on an
inconspicuous
area of the car just to get a 'feel' for the application.


ACCESSORIES CHECKLIST:
- 2 x buckets
- Access to clean water and/or a hose
- Car Shampoo (Might we suggest the AvalonKing Prep Shampoo?)
- Washmitt or sponges
- Claybar or Clay Mitt
- Iron / Tar remover chemicals (if necessary)
- Polish (might we suggest...)
- XL Drying towel
- IPA Spray (The AvalonKing Prep Spray is awesomesauce!)
If you've still got a couple of questions as always our Expert Care Team are online and ready to
help.
Talk to an expert
Soon as you have the prep down right and she's shining like a brand-new penny, hit the button
below,
it's
coating
time!
STEP 2: APPLYING ARMOR SHIELD IX
Hells Yeah,
The prep is complete so it's GO TIME, let's get you #COATEDBYTHEKING!
Your vehicle's looking pretty damn good right now, but Armor Shield IX is about to blow your
mind.
You might remember this nifty little instruction video from before, maybe give it one more watch
to just to
reinforce the process.

Okay, you've proven yourself worthy to this point, but a little step-by-step checklist never hurt anyone right? Here we go amigo...
- 1. CHECK THE WEATHER: Rain and moisture are the enemy while the coating cures, make sure the coast is clear if you've gotta work outside.
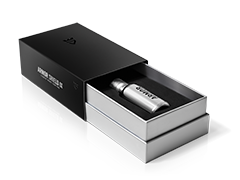
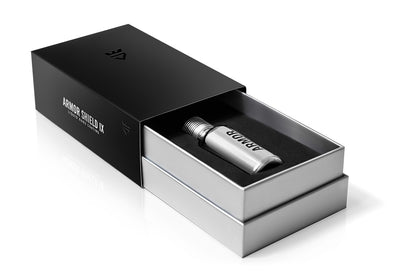
- 2. Check you've got the goods - gloves are your friend, so are clean microfiber buffing towels, the applicator block and suedes, and of course the star of the show - Armor Shield IX. Careful not to drop the bottle, that glass is tough but not unbreakable. And as the saying goes; "There's no use crying over spilt SiO2".
BASIC INSTRUCTIONS:
- 1. Wrap a microsuede cloth around the applicator block & apply 4 or 5 drops of Armor Shield IX
- 2. Wipe a thin layer across the car surface. First horizontally and then vertically to ensure an even application on a single panel or section. When the cloth feels dry, add more drops.
- 3. Let the coating sit between 1-5 minutes depending on temperature, then remove any residue by very gently buffing with a separate cloth or microfibre towel. I recommend folding the cloth/towel and gently wiping first with one side and then very lightly buffing with the other side. Very little pressure is required.
Ensure there is no residue or high/dark patches remaining.
Approximate Drying Times:
- 50F (10°C) wait 4-5 minutes
- 68F (20°C) wait 2-3minutes,
- 70F+ (25°C+) wait 1-2 minutes
Once done, proceed in applying and then buffing the coating 1 body part at a time to the rest of
the
vehicle.
After that, give it ideally 5 hours to dry in the sun. You can drive your car after, but make
sure you avoid
rain or
snow for a couple of days.
That's all there is to it? Told you it was a walk in the park.
Don't hesitate to reach out now to one of our online Expert Care Team if you have any thoughts
or queries -
we're here
to help. Remember you're in the AvalonKing Family now, we gotchu!
Talk
to an expert
Once you're done slap the button below to start the confetti and fireworks!!!!*
STEP 3: POST APPLICATION
CONGRATULATIONS! You're officially #COATEDBYTHEKING!
Welcome to this elite club of Kings and Queens who have mastered car care.


Now, you've got the car coated and are ready to experience the wonders of ceramic coating once it's cured. Here are a couple of key things to look out for:
- The weather: Has your car had time enough to cure away from weather or moisture? If so you're good to go, if not, try keep it stored away until the appropriate amount of time:
- Water Spotting: If your car is sitting idle for a long period after rainfall you may notice dusty spots where the rain has evaporated and left residue sitting on the car's surface. A simple rinse with a bucket of water or hose will remove this with ease. The residue cannot penetrate the cured coating so just sits lightly on top.
- High Spots: Make sure you've buffed out the coating properly to avoid any high spots. Get as close to the surface as you can or use a handheld light to find any and immediately buff them out. If the coating has hardened you may need to add more Armor Shield to try and activate the area again then buff off accordingly again.
- Water-beading and hydrophobicity: When your vehicle has had adequate curing time give it the water beading test. It will blow your mind. Simply pour or spray water/liquid onto the car's surface and watch it whip away
- Leftover Armor Shield IX: You'll have noticed that a little goes a long way when it comes to the AS9 liquid. So you may have a little left over in the bottle. It's good for about XX if resealed properly. And if you're lucky enough to have an unopened bottle then stick that bad boy on the shelf until you need a little top-up in about 2years. It will keep for approx XX years in any case.
- Microfibers: Once the coating starts to dry it will form little crystals that make your microfiber cloths hard or crusty (stop that!). Using these again can run the risk of tiny scratches down the line. Throw em out if the coating has hardened. You can always pick up more here.
- Adding more layers: If for some reason you want to add any more layers to your ceramic coating simply treat it as you would a new job. Make sure the surface of the old/existing coating is free from any contaminants, dirt, or grime with a thorough wash and IPA wipedown. If there is any damage we suggest you have it corrected also. Then simply apply as before. Easy!
Don't forget you can contact one of our online Expert Team now if you have any unanswered
questions, or you
just wanna
shoot the breeze.
Talk
to an expert
STEP 4: MAINTENANCE TIPS
How's it goin? Bet that vehicle is looking as slick a bald head
at a barn
dance.
Kicking ass and keeping things clean, that’s how we do things over here at AvalonKing. So here's
a couple of
handy tips
for maintaining that super glossy Armor Shield IX shine and longest lasting protection.
- Wash Your Car Every 2-3 weeks: If you’ve ceramic coated your daily beater with Armor Shield IX, you should be adhering to a bi-weekly car wash routine. This will help remove any contamination that does not get kicked to the curb by the ceramic coating’s hydrophobic properties, and will keep things like water spots from forming. Don't worry, cleaning a ceramic coated car takes a fraction of the time and effort it does on an uncoated car.
- Use the 2-Bucket Method: By dunking your wash mitt in a bucket that’s been filled with water, you are able to decontaminate it prior to filling it up with the soapy suds floating in the second bucket sitting beside it. This rinsing dunk should be made every time your mitt begins to grow dirty or run low on car shampoo, as it will help prevent the harmful smearing of contaminants across the vehicle’s exterior. Always work top to bottom.
- Use a Ceramic Coating Specific Shampoo: Just like there’s a reason why automotive-specific soaps exist, so too is there a reason behind the invention of ceramic coating specific car shampoos. Even many of the highly-rated car wash shampoos can contain abrasive chemical agents and punishing pH levels that will cause a silica-based ceramic coating to turn into a hot mess. Always use a ceramic coating friendly car shampoo, as it will not only safely clean all those coated surfaces, but also add shine and rejuvenating properties to the coating.
- Avoid Washing in Direct Sunlight: To ensure that your hard work returns optimum results, and prevent the formation of water spots, always scrub your vehicle beneath a covered structure, or in a heavily shaded outdoor area. If neither of these is available to you, wash the vehicle in the early morning or during evening hours, when the sun is low in the horizon and shadows loom tall. Avoiding water spots at all cost, is the name of the game folks, and you have to play, regardless as to whether you want to or not.
- Use Separate Car Wash Supplies for Wheels and Tires: Brake dust in particular is super nasty stuff, as it consists of millions of microscopic shards of metal shavings and pulverized, sand-like substances. Do yourself and your vehicle a favor. Wash your wheels and tires with a separate set of cleaning supplies first, as it will reduce the risk of spreading this nastiness to other areas of the vehicle.
Improving the life-expectancy and effectiveness of a ceramic coating is like oral hygiene. It
may be a tad
tedious and
time consuming but sticking with a routine that works will always bring forth the best results,
and will
keep you and
you ride from looking haggard. So, do you want a nice set of Baywatch-esque pearly whites, or
would you
rather look like
Sloth from "The Goonies". We thought so. Save yourself the Hassle(hoff).
*Shout out to my dudes old enough to know those references.